

Before you buy another closet organizer or stackable bin, it pays to think about what is actually inside the walls, floors, and ceilings you are building storage against. Studs, wiring, ductwork, plumbing lines, and structural framing all compete for the same space you are eyeing for shelves and cabinets. Ignoring them can mean cutting into a wire, blocking an air vent, or trapping moisture where you least expect it. This guide walks through how to plan smart storage that works with your home’s hidden systems instead of against them.
Mapping Electrical Wiring Before You Mount Shelving
Most homes route electrical wiring through wall studs at predictable heights, but predictable is not the same as guaranteed. Before drilling into any wall for floating shelves or built-in cabinetry, use a stud finder with electrical scanning capability to check for live wires. Outlets and switches are your best clue to where wiring runs vertically, so avoid heavy anchoring directly above or below them without checking first.
If you are planning a more ambitious built-in storage wall, it is worth having an electrician confirm the wiring layout before you commit to a design. This is especially true in older homes where wiring may not follow modern code patterns. A little diligence here prevents a shelving project from turning into a repair job.
- Use a combination stud and wire detector, not just a magnetic stud finder
- Avoid drilling within 6 inches directly above or below outlets and switches
- Turn off breakers when working near suspected wiring locations
- Photograph open walls during renovations for future reference
Working Around HVAC Ductwork and Vents
Ductwork often runs through walls, floors, and ceilings in ways that are not obvious until you start cutting into a space for a built-in cabinet or recessed shelving unit. Blocking a vent or squeezing a duct too tightly can restrict airflow, making certain rooms harder to heat or cool efficiently. If you notice uneven temperatures after a storage renovation, that could be a sign ductwork was disturbed or compressed during construction.
When in doubt, call in a professional before finalizing your storage layout near known duct runs. An HVAC repair technician can inspect the system, confirm duct locations, and advise whether a planned shelving unit or closet buildout will interfere with airflow. This small step can save you from costly comfort issues and higher energy bills down the road.
- Check registers and returns to estimate duct pathways before construction
- Never fully seal off a vent behind a built-in cabinet
- Ask about flexible duct rerouting if a wall cavity is needed for storage
- Monitor room temperature after renovations for early warning signs
Respecting Plumbing Lines in Bathroom and Kitchen Storage
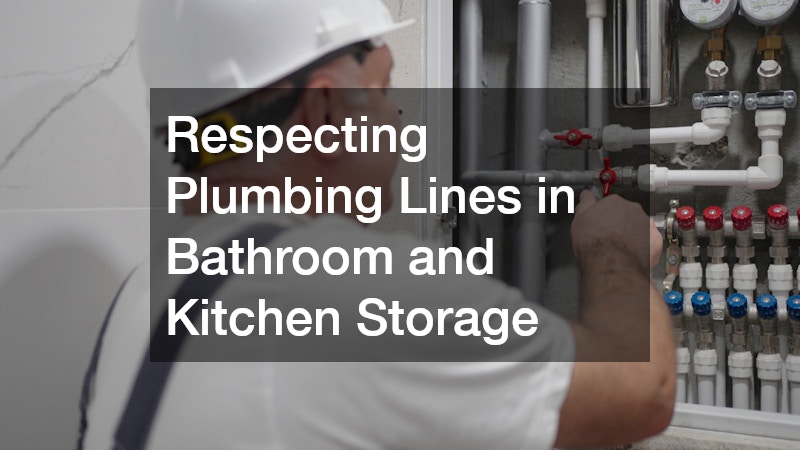
Bathrooms and kitchens are prime spots for added storage, but they are also dense with supply lines, drain pipes, and vent stacks hidden behind the drywall. Before installing a recessed medicine cabinet or a pull-out pantry system, it helps to know exactly where those lines run so you are not left patching a hole and a leak at the same time. This is especially important in kitchens with granite counter tops, since cutting into the wrong wall can mean removing or damaging heavy, expensive countertop sections to access the plumbing behind them. Wet walls, which contain the main drain stack, are especially risky to cut into without professional guidance.
A licensed plumbing contractor can locate pipes using tools like pipe locators or simply by reviewing the original plumbing layout if it is available. This is a smart step before any renovation that involves recessing storage into a shared wall between a bathroom and kitchen or laundry area. Getting this confirmed upfront is far cheaper than fixing water damage after the fact.
- Identify wet walls before planning any recessed storage
- Ask for as-built plumbing diagrams if you have them from a previous renovation
- Avoid deep recessed shelving in walls shared with showers or tubs
- Schedule an inspection if you notice dampness after installing new storage
Checking Structural Framing Before Built-In Installations
Not every wall in your home is created equal. Load-bearing walls have specific framing requirements, and cutting into them for recessed shelving or a built-in bench can compromise the structure if not done correctly. A contractor or structural engineer can confirm which walls are load-bearing before any significant modification takes place.
Even non-load-bearing walls have framing patterns you should respect, since studs, headers, and fire blocking all serve a purpose. Built-in bookshelves, window seats, and closet systems should be designed around existing framing rather than forcing framing to accommodate a design. This approach keeps your home structurally sound while still giving you the custom storage look you want.
- Identify load-bearing walls before any demolition begins
- Keep fire blocking intact when creating recessed storage cavities
- Reinforce framing if adding heavy built-ins like a Murphy bed or bookcase
- Consult a structural professional for any wall modification over a few feet wide
Addressing Crawlspace and Foundation Storage Risks
Many homeowners look to their crawlspace as an obvious storage solution, but this area is more sensitive than an attic or garage. Moisture, pests, and poor ventilation can quickly damage stored items and, worse, signal deeper issues with your home’s foundation. Before using this space for anything beyond seasonal totes, it is worth having it inspected for structural integrity and moisture control.
If you notice sagging floors, musty odors, or visible mold, these are signs that crawlspace repair should happen before you add any storage down there. Encapsulation, improved drainage, and vapor barriers are common fixes that make the space safer for limited storage use. Treating this area as an extension of your home’s foundation, rather than a forgotten dumping ground, protects both your belongings and your property value.
- Check for standing water or damp insulation before storing anything
- Use sealed plastic bins rather than cardboard in crawlspace storage
- Have vapor barriers inspected annually in humid climates
- Address foundation cracks before adding weight-bearing storage shelving
Planning Attic Storage Without Compromising Roof Integrity

Attics are a popular storage choice, but overloading them can stress roof framing that was never designed to hold heavy boxes or furniture. Insulation displacement is another common issue, since pushing insulation aside to make room for bins reduces its effectiveness and can raise energy bills. Before converting an attic into serious storage space, confirm the roof structure can handle the additional load.
It also helps to have roofers check for any signs of leaks or ventilation issues before you fill the space with belongings. A small leak that goes unnoticed under stacks of stored items can lead to significant water damage and mold growth over time. Getting a professional opinion before heavy attic storage use is a smart, low-cost precaution.
- Distribute weight across joists rather than concentrating it in one spot
- Keep insulation in place and build storage platforms above it
- Schedule a roof inspection if attic storage will be long-term
- Avoid storing items directly against the underside of roof decking
Adding an Outdoor Living Addition for Overflow Storage and Space
When indoor storage options run thin, some homeowners look outward, converting an underused patio into a hybrid living and storage space. A well-designed patio room can serve as a mudroom, seasonal gear closet, or flexible storage area while still functioning as usable living space. The key is choosing materials and a layout that can handle temperature swings and moisture without deteriorating quickly.
Because this kind of addition sits at the boundary between indoor comfort and outdoor exposure, it is worth consulting a contractor experienced in these builds to get insulation, drainage, and window placement right. Poorly planned patio rooms can trap humidity, leading to the same mold and pest issues you are trying to avoid indoors. Done well, though, this addition adds genuine square footage without the cost of a full home extension.
- Choose moisture-resistant flooring and cabinetry for a patio room used as storage
- Include proper drainage slope away from the foundation
- Add ventilation to prevent humidity buildup in enclosed storage areas
- Consider insulated windows to reduce temperature swings
Choosing Windows That Support Built-In Storage Nearby

Window seats, under-window cabinetry, and reading nooks are popular storage-meets-seating solutions, but they depend heavily on the condition and placement of the windows themselves. Older, drafty windows can undermine a cozy built-in by letting in cold air or moisture that damages nearby wood surfaces. Before finalizing a built-in design around a window, assess whether the window itself needs attention.
In many cases, window replacement makes sense as part of the same renovation, especially if the existing windows are single-pane or showing signs of seal failure. New, properly sealed windows protect the built-in storage you are investing in and improve the overall energy efficiency of the room. Pairing the two projects together also tends to be more cost-effective than tackling them separately later.
- Check for condensation or fogging between panes before building around a window
- Replace weatherstripping if drafts are minor rather than replacing the whole window
- Choose low-maintenance frame materials near built-in storage areas
- Time window and built-in projects together to reduce disruption
Extending Storage Outdoors With Smart Landscaping Choices

Outdoor storage sheds, benches with hidden compartments, and garden storage boxes all depend on how well the surrounding landscape drains and supports them. Poor grading can lead to water pooling around outdoor storage structures, causing rot, rust, or a slowly sinking foundation over time. Before placing any outdoor storage feature, evaluate how water moves across your yard during heavy rain. Start by watching your yard during an actual storm, if you can, and note any spots where water collects or moves in sheets toward a low corner. As a rule of thumb, ground should slope away from any structure at about a 2% grade, or roughly a quarter-inch drop per foot for the first several feet. If your yard doesn’t naturally do this, a bit of regrading or a gravel base under the shed can redirect water before it becomes a problem. Placement matters just as much as grading. Setting a shed or storage box even a few inches above grade on a bed of crushed stone or concrete blocks keeps wood and metal from sitting in standing water after rain. It’s also worth checking where downspouts empty out, since a gutter dumping runoff a few feet from your storage structure can undo all your grading work. Finally, think about soil type and long-term settling. Clay-heavy soil drains slowly and holds moisture longer, which may call for a French drain or gravel trench nearby, while sandy soil drains fast but may shift and settle unevenly under a heavy shed. Matching your foundation approach to your soil conditions now can save you from costly leveling or repair work a few years down the line.
Working with landscaping contractors to grade the area properly, or to install a small retaining wall or gravel base, can extend the life of outdoor storage significantly. Proper grading directs water away from shed foundations and gravel bases (typically 4-6 inches of compacted crushed stone) prevent moisture from wicking up into wood or metal structures. A slight slope of about one inch per foot leading away from the storage area is usually enough to keep standing water from becoming a long-term problem. This is also a good time to think about how mature trees or new plantings might interact with your storage plans, since roots can shift foundations over the years. Fast-growing species like willows or silver maples send out aggressive root systems that can travel 20 feet or more in search of moisture, easily reaching a shed or retaining wall. Even seemingly harmless shrubs can cause slow, cumulative damage if planted too close to a foundation. A visit to a local tree nursery for appropriately sized, slow-spreading species near structures can prevent root damage down the line. Staff at a tree nursery can point you toward dwarf or clumping varieties suited to your soil type and climate, along with realistic mature spread so you can plan spacing correctly. Keeping larger trees at least 10-15 feet from any storage structure gives roots room to grow without threatening what’s underground or overhead.
- Grade soil away from outdoor storage structures with a slope of at least 1 inch per foot for the first 6 feet, preventing pooling that leads to rot or foundation shifting
- Use gravel or paver bases under sheds for better drainage, ideally 4-6 inches of compacted gravel topped with landscape fabric to block weed growth
- Choose tree species with non-invasive root systems near storage areas, such as dogwood or crabapple, and avoid willows or maples whose roots can crack foundations or clog drainage
- Keep new plantings at least 5-10 feet from structure walls to give roots room to grow without threatening buried utility lines or footings
- Reassess landscaping every few years as plants mature, trimming back branches that overhang roofs or roots that creep toward foundations
Coordinating Renovation Timing With a Household Move
If your storage overhaul is happening alongside a move, timing becomes just as important as the design itself. Trying to finish built-ins, closet systems, or garage shelving while boxes are already piling up can create safety hazards and construction delays. Planning storage improvements before or well after a move tends to produce better results than doing everything at once.
Coordinating with moving companies ahead of time can help you sequence the work so that renovation crews and movers are not competing for the same space on the same day. Some homeowners choose to complete major structural or electrical work before moving in, then add finishing touches like shelving and cabinetry afterward. This staged approach reduces stress and helps ensure that new storage solutions are built around the home’s actual systems rather than rushed into place.
- Schedule renovation milestones before move-in day when possible
- Communicate timelines clearly between contractors and movers
- Store fragile items separately during any construction phase
- Leave buffer days between major renovation work and move day
Smart storage is never just about aesthetics or square footage, it is about understanding the systems that keep your home safe, comfortable, and structurally sound. Taking time to check wiring, plumbing, ductwork, framing, and drainage before you build ensures your new storage solutions last for years rather than causing costly problems later. Start by identifying which areas of your home you are considering for storage upgrades, then bring in the right professionals to confirm what is happening behind the walls, floors, and ceilings before any work begins.