

You have spent weeks browsing inspiration photos, picking finishes, and imagining your new kitchen or backyard oasis. But somewhere between the mood board and the first demolition day, an old pipe leaks, a roof leak surfaces, or a wall opens up to reveal rot nobody saw coming. Without money set aside for these surprises, even the most carefully designed renovation can stall out, get scaled back, or blow past its timeline. Understanding why repair budgets matter, and how to build one, can be the difference between a finished project and an expensive half-done one.
The Hidden Costs That Design Plans Rarely Include
Design plans are built around the visible and the desired: cabinet styles, paint colors, layout changes, and fixtures. They rarely account for what is happening behind the walls, under the floors, or above the ceiling, because those things are not part of the aesthetic vision. Designers and homeowners naturally gravitate toward the fun decisions, while wiring, plumbing, and framing get little more than a passing assumption that they’re “probably fine.” The problem is that older homes especially tend to hide decades of wear that only becomes obvious once contractors start opening things up. Knob-and-tube wiring behind a wall, galvanized pipes that have corroded from the inside out, or subfloor damage from a slow, unnoticed leak are common discoveries in homes built before the 1980s. Even newer homes aren’t immune — poor original construction, water intrusion, or pest damage can create six-figure surprises hiding behind a perfectly nice coat of paint. These issues rarely show up on a materials list or a designer’s mood board, because nobody can budget for a problem they can’t see. A contractor might not know a wall has termite damage until the drywall comes down, or that a bathroom’s plumbing needs a full repipe until the tile is pulled up. That uncertainty is exactly why these costs get left out of the initial plan — not through negligence, but because they’re genuinely unknowable in advance. A homeowner who budgets only for the pretty parts of a renovation is setting themselves up for a mid-project scramble. Without a cushion set aside specifically for repairs, discovering rot, mold, or outdated electrical mid-project forces an impossible choice: pause the entire renovation to find more money, or patch the underlying problem cheaply and hope it holds.
This gap between design intent and structural reality is the single biggest reason projects stall. A kitchen remodel budgeted for cabinets, countertops, and flooring can grind to a halt when a contractor opens a wall and finds outdated wiring that no longer meets code, or a subfloor softened by a slow leak that’s gone unnoticed for years. These aren’t rare surprises — industry estimates suggest 15% to 20% of renovation budgets end up absorbed by unforeseen repairs once walls, floors, or ceilings are opened up. Once unexpected repair costs appear, homeowners often have to choose between pausing the project, taking on debt, or cutting corners elsewhere in the design. Pausing means paying twice: once for the temporary teardown and again to restart labor and materials weeks or months later. Taking on debt through a credit card or high-interest loan can quietly erase the value the renovation was supposed to add. And cutting corners — swapping the tile you wanted for a cheaper option, or skipping the outdoor lighting — leaves you with a finished space that doesn’t match the vision you started with. None of those outcomes are ideal, which is why building a repair contingency from day one changes the entire trajectory of a renovation. A well-planned budget typically sets aside 10% to 20% of total project costs specifically for structural or mechanical surprises, scaled up for older homes or properties with a history of water damage. That cushion doesn’t just prevent financial stress — it preserves the design itself, so the plan you fell in love with is the one that actually gets built.
Roofing Problems That Surface Once Work Begins
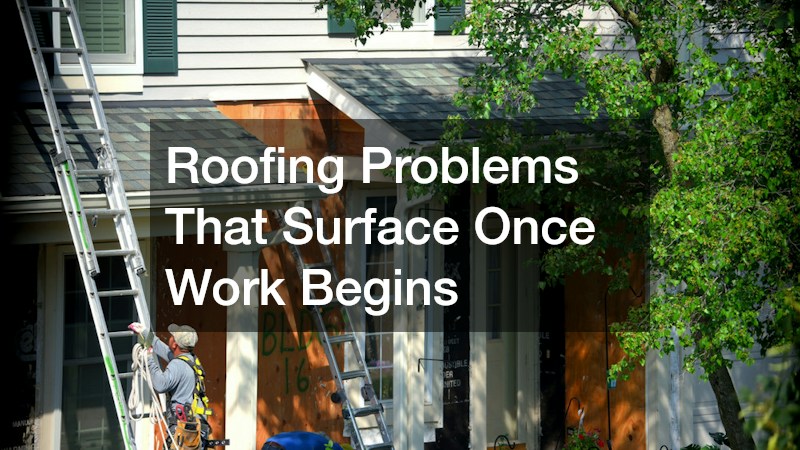
Roofs are notorious for hiding damage until someone gets up close. A design plan might call for a beautiful skylight addition or a change to the roofline, but once residential roofing companies get on site, they often find soft decking, old flashing, or water staining that points to a slow leak. These issues rarely show up in a curbside inspection or a quick walkthrough. It usually takes pulling back shingles, cutting into decking, or climbing into the attic to see how far the damage extends. By the time a crew is ready to frame that new skylight, they may discover rotted plywood that needs full replacement, rusted flashing around chimneys or vents, or insulation soaked from months of undetected moisture. None of these discoveries are optional fixes. Building codes typically require sound decking and proper flashing before any new roof penetration, so skipping them isn’t just risky, it’s often not allowed. That means the budget has to absorb the cost of structural repair before a single cosmetic upgrade can happen. The price swings here can be significant. Replacing a few sheets of plywood decking might add a few hundred dollars, but widespread rot, mold remediation, or a full re-decking job can run into the thousands. Homeowners who plan for this contingency avoid the panic of choosing between finishing the project and paying for repairs they never saw coming.
Because roofing repairs can range from a simple patch to a full section replacement, it is smart to have a flexible amount set aside specifically for this system. A basic shingle repair might run a few hundred dollars, but once contractors pull back damaged materials and find soft decking or compromised trusses, that number can climb into the thousands. Setting aside 10 to 15 percent of your projected roofing costs as a buffer is a reasonable starting point for most renovation budgets. Homeowners who skip a roof inspection before finalizing their design often find themselves reworking their entire budget once the scope of the damage becomes clear. A qualified inspector can check for granule loss, flashing separation, and attic ventilation issues that aren’t visible from the ground. Spending a few hundred dollars on this upfront assessment can save thousands in unplanned expenses later. In many cases, roof repairs uncovered mid-project turn out to be more extensive than expected, since a small leak or a few damaged shingles can point to problems that have been developing underneath for years. Water intrusion, for instance, often travels along rafters before showing up as a stain on the ceiling, meaning the visible damage rarely matches the true extent of the problem. Mold growth, rotted sheathing, and weakened support beams are common discoveries once crews open up a roof that looked stable from the outside.
- Ask for a roof inspection before finalizing any design that involves the attic or roofline, especially if you’re adding skylights, dormers, or vaulted ceilings
- Set aside extra funds if your roof is older than 15 years — budget 10-15% of the roofing line item for hidden repairs like rotted decking or damaged flashing
- Request photos of any damage found so you understand the scope before approving repairs, and ask the contractor to explain which fixes are code-required versus optional
- Watch for signs that often go unnoticed until work begins, such as soft spots in the decking, water stains in the attic, or corroded vent boots
- Consider timing exterior repairs before interior finish work begins, since water intrusion during construction can ruin new drywall, insulation, or flooring
- Get a written estimate range for worst-case scenarios, like full deck replacement, so a surprise doesn’t stall the entire project
Plumbing Surprises Behind Walls and Under Floors
 Few things derail a renovation faster than opening a wall and finding corroded pipes or a slow leak that has been damaging framing for years. A plumber brought in early in the process can flag these issues before they become part of a bigger, more expensive emergency. Older homes with galvanized or outdated piping are especially prone to this kind of surprise, and ignoring it only delays the inevitable.
Bringing in a professional for a walkthrough before finalizing your design saves both money and stress later. It also gives you the chance to build plumbing repair costs into your budget upfront rather than treating them as an emergency expense that competes with your design priorities.
Water Heater Age and Its Impact on Renovation Timelines

A water heater tucked away in a basement or utility closet is easy to forget about when you are focused on choosing tile and countertops. But if a remodel involves moving or reconnecting plumbing lines, an aging unit can suddenly become part of the project whether you planned for it or not. Water heater replacement is often needed when a unit is more than 10 to 12 years old, and contractors may recommend swapping it out during a renovation rather than waiting for it to fail later.
Replacing this component proactively, while walls are already open, is usually far cheaper than doing it as a standalone emergency repair after your new finishes are in place. Factoring this into your budget early prevents a scenario where a failed unit floods your brand-new flooring just months after installation.
Foundation and Basement Conditions That Change the Scope
Basements often carry the most uncertainty of any space in a home, especially when it comes to moisture, cracks, or uneven flooring. A basement remodeling company will typically want to assess these conditions before committing to a finished design, because moisture problems have to be solved before drywall, flooring, or insulation go in. Skipping this step risks mold growth and repeated repairs down the line.
Homeowners who assume their basement is renovation-ready often discover otherwise once real work begins. Setting aside a portion of the budget for waterproofing, crack repair, or drainage correction ensures that these below-grade surprises do not force you to abandon your original design altogether.
Exterior Cladding Damage Discovered During Updates

Curb appeal projects often start with a simple idea: fresh paint, new trim, or a modern color update. But once crews start removing old panels, they frequently find rot, insect damage, or moisture intrusion that was hidden beneath the surface. Replacing damaged siding is not a cosmetic decision at that point; it is a structural necessity that protects the rest of your home from further damage.
- Look for soft spots, warping, or discoloration before starting exterior work
- Budget extra if your home has original material from more than 20 years ago
- Ask contractors to check insulation and sheathing condition, not just the surface material
- Prioritize repairs in areas prone to standing water or poor drainage
Garage Structural and Mechanical Issues
Garages are often an afterthought in design planning, treated as simple storage rather than a functional part of the home. But when a garage door installation is part of a larger renovation, contractors sometimes find that the surrounding frame, tracks, or opener wiring need updating to safely support new equipment. This is especially common in older homes where the garage was never upgraded alongside the rest of the house.
Because garage doors are heavy and mechanically complex, cutting costs on necessary structural repairs can create safety hazards down the road. It is worth having a modest reserve specifically for this area if your renovation touches the garage in any way.
Outdoor Structures That Need Attention Before Aesthetic Upgrades
Backyard design plans often include a new patio, landscaping, or a matching outdoor structure for storage. If you are working with a shed builder as part of that vision, it is worth having the existing structure or foundation site assessed first, since uneven ground or old rotting bases can undermine even a beautifully designed addition. Skipping this step means your new structure may inherit the same problems as the one it replaced.
Site prep costs, including grading and drainage corrections, are easy to underestimate when you are focused on the finished look of your yard. Building a small buffer into your budget for these unglamorous but necessary steps keeps your outdoor project on schedule.
Appliance Compatibility and Replacement Needs
A stunning kitchen design can be undermined quickly if existing appliances do not fit the new layout or fail shortly after installation. Working with an appliance dealer early in the design process helps you understand sizing, electrical, and venting requirements before cabinetry and countertops are finalized. This prevents the frustrating scenario of a beautiful new kitchen built around an appliance that has to be swapped out months later.
It also helps to ask about warranty coverage and expected lifespan when selecting new appliances, since replacing one major unit unexpectedly can eat into funds meant for finishing touches elsewhere in the home.
- Confirm appliance dimensions before finalizing cabinet layouts
- Ask about electrical or gas line requirements for new units
- Consider energy efficiency ratings to reduce long-term utility costs
- Keep documentation of warranties in one place for future reference
A design plan is only as strong as the budget behind it, and repair costs are the part most homeowners forget to plan for until it is too late. Building in a contingency fund of 15 to 25 percent beyond your design budget gives you room to handle surprises without abandoning your vision. Before you commit to finishes and fixtures, invest time in getting your home’s major systems inspected so you know what you are truly working with. That small step upfront can be the reason your project reaches the finish line intact.