

Before you tear into paint swatches and flooring samples, take a walk around the outside of your house. Your exterior is the first thing guests and buyers see, and it quietly protects everything you’re about to renovate indoors. Skipping exterior repairs before an interior remodel is one of the most common and costly mistakes homeowners make. This guide walks through the exterior systems worth checking first, so your interior investment actually lasts.
Inspecting Your Roof for Hidden Damage
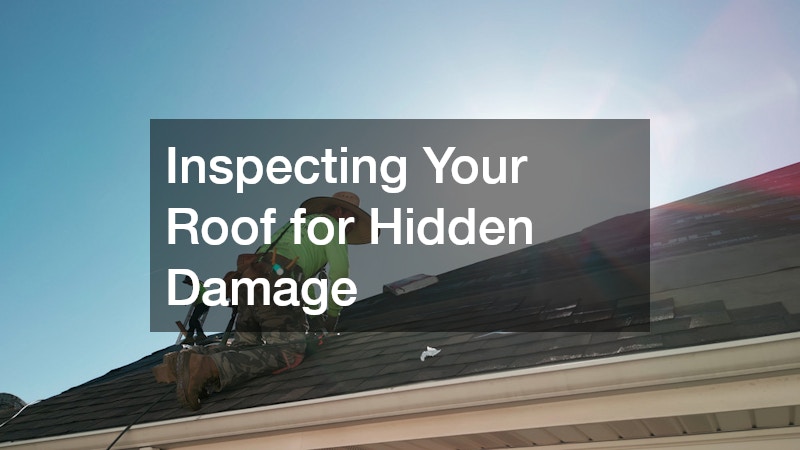
Your roof is the single most important barrier between your home and the elements, and any weakness there can undermine fresh paint, new flooring, or updated ceilings within a single season. Small leaks often go unnoticed for months, slowly staining drywall, warping wood framing, or feeding mold growth in the attic before homeowners realize what’s happening. By the time a water stain appears on your ceiling, the damage above it may have been developing for a year or more. A proper inspection should cover more than just a glance at the shingles. Look for curling, cracking, or missing shingles, rusted or lifted flashing around chimneys and vents, sagging areas that suggest deck damage, and granules collecting in your gutters, which often signal that shingles are nearing the end of their lifespan. Soft spots underfoot on a walkable roof can also point to rotting plywood underneath. Before you schedule any interior work, it’s worth having local roofers come out for a thorough inspection, especially if your roof is more than ten years old or hasn’t been checked since the last major storm. Many roofing companies offer free or low-cost inspections and can provide photo documentation of problem areas, which is useful both for planning repairs and for insurance purposes if storm damage is involved. Catching issues early is almost always cheaper than dealing with the fallout. A $300 repair to reseal flashing or replace a few shingles is a much better outcome than tearing out freshly finished drywall six months after your interior remodel because a slow leak finally made itself known.
Before you touch the interior, spend an afternoon—or hire a professional for an hour—getting a close look at your roof’s condition. A trained inspector can catch curling or cracked shingles, damaged flashing around chimneys and vents, and clogged gutters that trap water against the roofline. These small issues are cheap to fix now but expensive to ignore. Roofs typically last 20 to 30 years depending on the material, but sun exposure, hail, and freeze-thaw cycles can shorten that lifespan considerably. Look for granules collecting in gutters, dark streaks on the shingles, or soft spots when walking the roof deck—all signs that moisture may already be working its way underneath. Addressing these problems now prevents a much costlier scenario: repainting ceilings twice, replacing new carpet, or dealing with mold after a surprise leak. A $300 flashing repair today is far cheaper than the $3,000 in drywall, insulation, and flooring damage a slow leak can cause over a single rainy season.
- Look for missing, cracked, or curling shingles from the ground, and use binoculars to spot granule loss or bald patches
- Check attic insulation for dark spots or musty smells after rain, both signs of slow leaks that haven’t yet reached your ceiling
- Inspect flashing around chimneys, vents, and skylights, since these joints fail years before the shingles do
- Note your roof’s age; asphalt shingles typically last 20-25 years, while metal and tile can exceed 40-50
- Ask about the remaining lifespan of your current roofing material given your local climate and sun exposure
- Get a written estimate before committing to repairs versus replacement, and request itemized costs for materials, labor, and disposal
- Confirm whether the estimate includes a warranty on workmanship, not just manufacturer coverage on materials
Evaluating Your Siding and Exterior Trim
Siding does more than shape your home’s curb appeal; it seals the walls against moisture, pests, and temperature swings that can seep inward and affect your interior renovation. Cracked panels, warped boards, or faded caulking around windows are signs that water may already be finding its way behind the surface. A reputable siding company can evaluate whether your existing material needs patching, repainting, or a full replacement before you start on interior walls.
Replacing siding before interior work also makes practical sense from a scheduling standpoint, since exterior crews won’t need to walk through freshly finished rooms with equipment and materials. This sequencing protects your new interior work from dust, debris, and accidental damage.
- Inspect corners and seams for gaps that let moisture in
- Watch for bubbling paint, which often signals trapped water
- Compare vinyl, fiber cement, and wood options for your climate
- Schedule siding work at least a few weeks before interior painting begins
Addressing Plumbing Issues That Start Outside
Many interior water problems actually begin outside the house, whether it’s a slow leak in an underground line, a failing hose bib, or tree roots pressing into old pipes. These issues can silently increase your water bill or cause dampness in crawl spaces long before you notice a stain on an interior wall. Bringing in the best plumber you can find for an exterior plumbing check is a smart move before you finalize any interior remodeling plans.
A plumber can also pressure-test outdoor spigots, inspect the main water line, and check for corrosion around exterior fixtures. Catching a small leak now is far less disruptive than tearing into a newly renovated bathroom wall six months later.
- Check exterior faucets for constant dripping or low pressure
- Look for unusually soggy patches in the yard near the foundation
- Ask about the age and material of your main water line
- Schedule outdoor plumbing repairs before landscaping or hardscaping projects
Managing Trees and Landscaping Near the House
Overgrown branches and aggressive root systems can quietly damage siding, gutters, and even foundations if left unchecked for years. Branches that scrape against the roof during storms wear down shingles faster, while roots can shift soil and create drainage problems close to the house. Hiring professional Tree Services to trim overhanging limbs and assess root health is a practical step before starting any exterior refresh.
Beyond protecting your home’s structure, well-maintained trees and shrubs make a real difference in curb appeal once your exterior updates are complete. Clearing debris and trimming back growth also gives contractors easier access to walls, windows, and rooflines during repair work.
- Trim branches at least six feet away from the roofline
- Watch for roots lifting sidewalks or driveways near the house
- Remove dead or diseased trees before storm season
- Schedule tree work before scheduling roof or siding repairs
Repairing Water Damage Before It Spreads Indoors
If you’ve noticed peeling paint, musty odors, or soft spots near your foundation, water may have already made its way into places you can’t easily see. Left untreated, this kind of moisture intrusion can compromise insulation, drywall, and even structural framing, undoing any interior work you plan to do. Reputable water restoration companies can assess the extent of the damage and dry out affected areas properly before repairs begin.
Acting quickly matters here, since mold can start developing within 24 to 48 hours of sustained moisture exposure. Getting ahead of water damage protects your family’s health and ensures your interior renovation isn’t compromised by hidden problems behind the walls.
- Look for discoloration or bubbling on exterior-facing interior walls
- Check crawl spaces and basements for standing water after storms
- Note any musty smells that persist even after cleaning
- Address grading issues that direct water toward your foundation
Testing Your Garage Door for Function and Seal

The garage door is one of the largest moving parts on your home’s exterior, and a worn seal or misaligned track can let in drafts, pests, and moisture that eventually affect attached rooms. If your door sticks, makes grinding noises, or doesn’t seal tightly at the bottom, it may be time to consider garage door installations rather than another round of patchwork repairs. A properly functioning door also plays a role in your home’s overall energy efficiency.
Newer garage doors come with better insulation and weather stripping, which can noticeably reduce temperature swings in adjacent living spaces. This is particularly useful if you’re planning interior updates to a room that shares a wall with the garage.
- Test the door’s balance by disconnecting the opener and lifting manually
- Check weather stripping along the bottom and sides for gaps
- Listen for unusual noises during opening and closing
- Consider insulated models if the garage borders living space
Upgrading Outdoor Living Features Like Pools and Patios
If your backyard includes a pool, patio, or other outdoor living feature, it’s worth assessing its condition alongside the rest of your exterior refresh. Cracked pool decking, failing tile, or outdated equipment can detract from your property’s value even if your interior renovation is flawless. Consulting a swimming pool contractor before finalizing your exterior plans helps ensure the backyard doesn’t become the weak link in an otherwise updated home.
Coordinating pool repairs or upgrades with your exterior refresh can also save money, since contractors are often already on-site with equipment and materials. It’s easier to match paint colors, decking materials, or fencing when everything is planned together rather than tackled separately.
- Inspect pool decking for cracks or uneven surfaces
- Check pump and filtration equipment for age and efficiency
- Consider resurfacing options if tile or plaster looks worn
- Plan pool updates to complement your home’s exterior color scheme
Preparing Your HVAC System for Year-Round Comfort

An often-overlooked part of an exterior refresh is the condition of your outdoor HVAC equipment, since units exposed to years of sun, rain, and temperature swings can become less efficient or start to fail well before you’d expect. Refreshing siding, trim, or landscaping around a tired, corroded condenser unit can make the whole project look unfinished, so it’s worth inspecting the equipment before you finalize your exterior plans. If your air conditioning unit is more than 12 to 15 years old, has needed frequent repairs, or you’ve noticed rising energy bills despite normal usage, it may be time to consider air conditioning replacement before finishing your interior updates. Older units often rely on refrigerants that are being phased out, which can make future repairs costly or impossible to source. A failing compressor, unusual cycling, or visible rust and warping on the cabinet are all signs that replacement makes more sense than another patch repair. New units tend to be quieter, more efficient, and take up less visual space along the exterior wall, which matters if you’re also updating siding, paint, or foundation landscaping in the same area. Many modern systems carry SEER2 ratings well above older models, meaning lower monthly cooling costs and a smaller footprint for the same or better performance. Coordinating this replacement with your exterior work also lets contractors run new lines or adjust the pad location before your fresh siding or hardscaping goes in, saving you from cutting into finished surfaces later.
Since your exterior walls are already exposed for renovation, it’s the ideal time to have a heating company inspect the furnace or heat pump system as well. Exterior components like vents, exhaust lines, and refrigerant lines can wear down alongside cooling equipment, and small issues like cracked seals or corroded flashing are far easier to fix before new siding or insulation goes up. Catching these problems now can save you from tearing into fresh work later. A thorough inspection typically checks for proper airflow, worn belts or motors, and signs of rust or moisture intrusion near wall penetrations. Many heating companies also test carbon monoxide levels and combustion efficiency, especially for gas furnaces, since blocked or damaged vents can pose serious safety risks. If your system is more than 10-15 years old, ask about efficiency upgrades that could be installed while the walls are already open. Addressing both heating and cooling systems together ensures your home stays comfortable in every season without unexpected mid-renovation surprises. It also lets you coordinate any necessary wall penetrations, like new vent placements or line sets, in a single pass rather than reopening finished work down the road.
- Check outdoor units for rust, dents, or unusual noises that may signal refrigerant leaks or worn components
- Compare SEER and HSPF ratings before replacing equipment, since higher ratings mean lower long-term utility costs
- Schedule seasonal maintenance each spring and fall for both heating and cooling systems to catch issues before extreme temperatures hit
- Clear debris, leaves, and overgrown plants away from outdoor units regularly, keeping at least 2 feet of clearance for proper airflow
- Replace air filters every 1-3 months to maintain efficiency and indoor air quality
- Inspect ductwork for leaks or gaps that can waste energy and strain the system
Planning Logistics When Renovations Require Temporary Relocation

Larger exterior projects, like a full roof replacement or siding overhaul, sometimes require homeowners to temporarily store furniture or even relocate for a few days. If your renovation timeline overlaps with major work, looking into moving services early can prevent last-minute stress. Having a plan for where belongings will go during noisy or dusty exterior work keeps your interior spaces protected in the meantime.
This kind of planning is especially useful for homeowners tackling both exterior and interior projects back-to-back, since it creates a buffer between phases. A short-term storage solution or moving crew can make the transition between exterior repairs and interior updates far smoother.
- Ask contractors for a realistic project timeline before scheduling movers
- Consider temporary storage for furniture during major exterior work
- Protect flooring and walls with coverings if you stay on-site
- Coordinate move dates around weather-dependent exterior projects
A truly successful home renovation starts from the outside in, not the other way around. By addressing your roof, siding, plumbing, landscaping, and other exterior systems first, you protect the time and money you’re about to invest indoors. Take a slow walk around your property, make a list of what needs attention, and tackle those exterior projects before the interior work begins. Your future self, and your newly updated rooms, will thank you for it.